
I’m back!!!! After
3-1/2 months of renovation work, I’m thrilled to say the work on the townhouse
is FINISHED! I’ll need a little time to
sort through all the photos and get them organized, but I can’t wait to share
the big reveal with you. I’m still amazed
at the changes!
While working on this reno, I pretty much put all my
personal projects on hold (hence the lack of posts the past few months). I did manage
to work on a couple DIY projects though as we got to the end of the reno and
closer to the staging process.
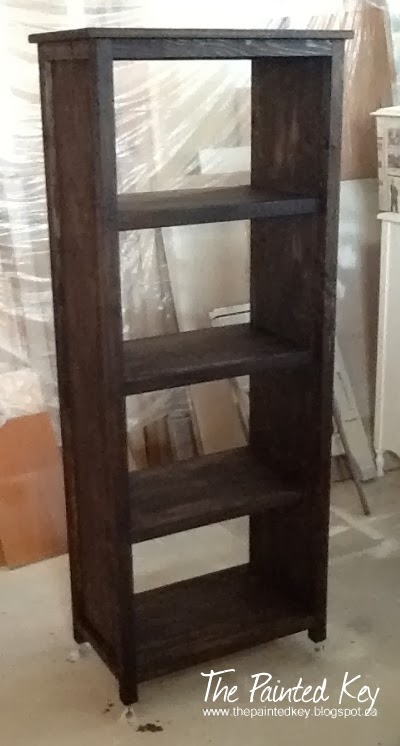
One of
them included a bookshelf for the living room.
With the furniture going in, we were left with a “blank wall” that I
felt needed to be filled up and decided I could build something. I chose to
use Ana White’s plan for her Kentwood bookshelf. While my hubby had a couple guys over to watch
hockey one evening, I spent a few hours in the garage cutting, drilling &
assembling a bookshelf.


I changed the plan a little and built it from
¾” sanded pine plywood that I had cut into 11-1/4” panels at the store and used
SPF white wood for the “legs” and shelf edges.
While I normally go with a lighter chestnut color stain, I
decided to try a darker color and choose Minwax Jacobean. Wow – definitely darker than I was used to
and a little scary applying to the white pine!

Little side note - have you seen these amazing little painters
triangles? Placed under your project,
they prop it up away from the floor or table surface and make painting or
staining a piece SO much easier!!!

ANYWAY....because we were in a bit of a time crunch, I
chose to only apply a single coat of stain and a single coat of wipe-on
poly. I’ll likely add a few additional
coats of poly later on, but for now the bookshelf is the perfect piece to fill
up that blank wall space.


Thanks for popping by!

No comments:
Post a Comment
Thoughts or comments? I'd love to hear them!